Create Slots
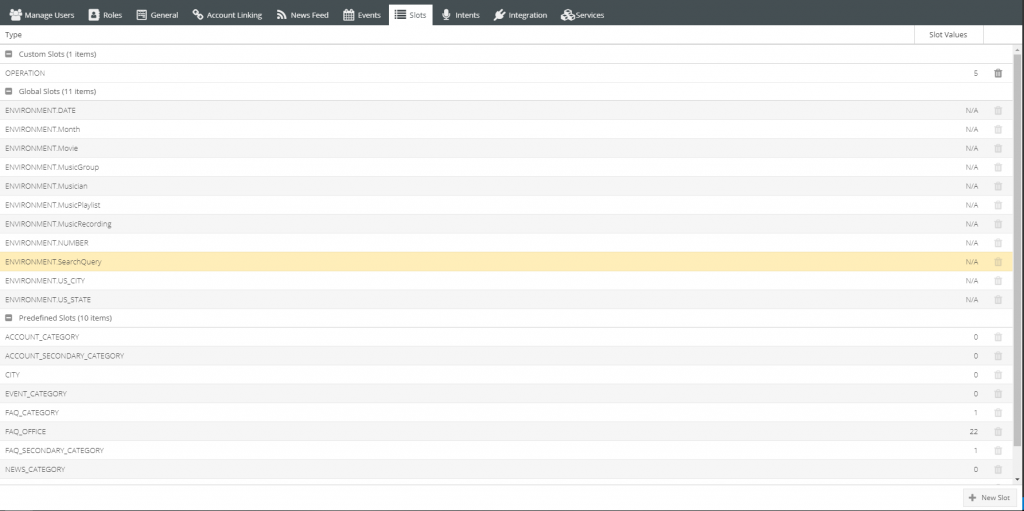
- Click the + New Slot button in the bottom right corner.
- Name the Slot. It is recommended that the name be upper cased, and if it’s multiple words to be separated by an underscore, “_”.
Example:
AISLE_CATEGORY
Add Value
- Click “+ Value” (top right)
- A new row will appear
- Another grid will appear on the right hand side with a Name and Value column
- Fill out Value field
- This field is dependent of the slot. This value can be a verb (find, search…etc.), the name of a city or county, a department or office of the city/county, a noun, etc.
- To add a synonym click within the synonym column next to the desired value. After typing the word press the comma key [,] to append the synonymSynonyms can help catch other possible user input in order to answer the proper questions
- Metadata for Slots
- If slots have additional metadata that can be used in association to a slot value, this would be added in the right hand side of the grid
- This metadata is available for use in handlebar templates
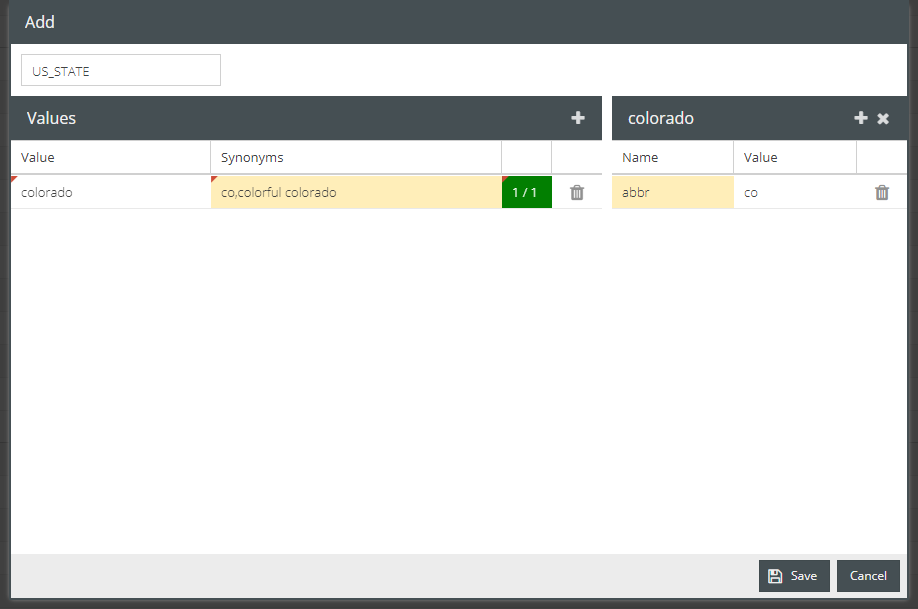
Metadata Example:
Slot: US_STATE
value: colorado (full name)
synonym: [] ## no synonyms
metadata: {
    name: abbr,
    value: co
}
## in handlebars, 'abbr' can be accessed e.g. {{inputs.State.abbr}}
4. Click Save (bottom right)
Delete Value
- Click the trash can at the right of the row for which slot value to be removed
Delete Synonym
- Click desired synonym column
- X’s will appear next to synonyms. To remove specific synonym(s), click on the X located within the synonym block
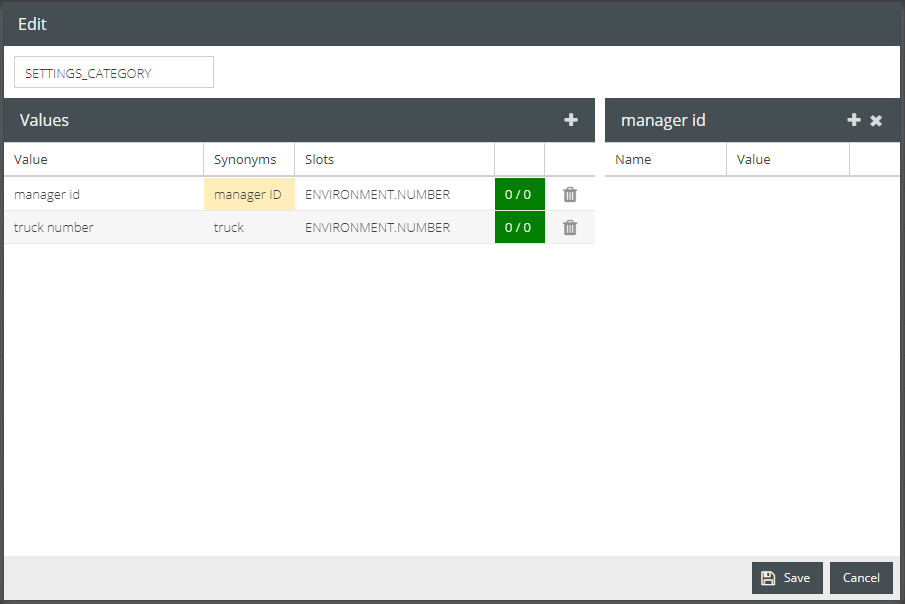
Settings Slot
- Scroll to Predefined Slots
- Double-Click the SETTINGS_CATEGORY slot
- Similar to adding slot values and synonyms, fill out desired settings
| Value | Synonyms | Slots |
| zipcode | zip code | ENVIRONMENT.NUMBER |
- In SETTINGS_CATEGORY, a slot type has to be provided for the type the value is meant to be
- Click into the Slots Column, select a slot type from the drop down menu
- Metadata can optionally be added for SETTINGS_CATEGORY as well
Create Intents
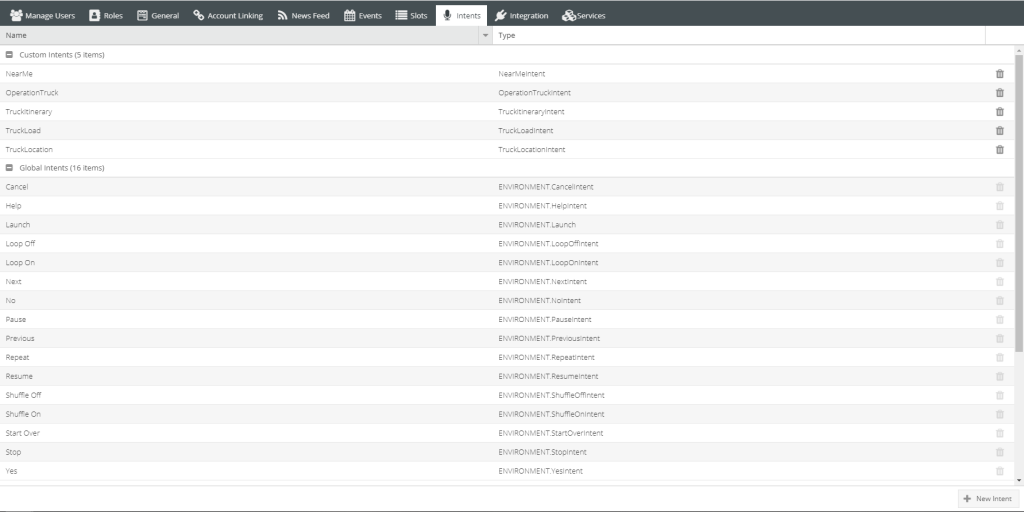
- Click + New Intent in bottom right corner of intents tab
- Type in an Intent Display Name appropriate to what this intent will answer
- The Intent Name will be shown on the right
- The Intent Name is not editable, for display and server use
- Type the mad-lib
- Make sure to think of all possible ways a user may phrase the mad-lib, or question
- Once phrase has all possible slots to be used, click + Sample to the right to add to the intent samples grid
- Add the fill-in-the-blank slots by using braces. e.g. {SlotName}
- Slots are recommended to have the beginning letter upper-cased for each word:
"how do I {ActionExample} a skill"
- A new row will be created for each slot that is used within the intent
- Apply a Slot Type in the middle column on the right side for the Slot used in an utterance. The Slot Type will have the available values to be used within the phrase
- Make sure to use unique enough phrases in each intent so that the skill can correctly answer each user question as accurately as possible
- Select a primary sample to be used to view in Insights and Interactions
- It is recommended to use a sample that best describes the potential questions and intent
- It is also recommended if possible to use a sample with a many of the slots within the intent
- When choosing a sample with the most slots within the intent, it allows Voxly to display all possible slot values used in a sample and which weren’t used